
Jeg har syet en del til mine egne børn men nu tænkte jeg det var på tide at forny den bare en lillebitte smule. Jeg tilføjede en sløjfe og blev så begejstret for resultatet at det blev til denne DIY. Jeg har syet denne i jersey, men den kan også laves i fast bomuld.
Do you remember the big hit in the 90´ties, the Scrunchy. I had a lot of them in al kinds of more or less ugly colors, and with beadings on them. And I loved them. So I must admit I was quite exited when the started to come back. I have already made some regular ones for my girl, but I thought it was time to do something different. So I added a bow, I just love bows!! And actually I was so happy with the result, that I just had to make a DIY for you guys. I hope you like it. I have made this in jersey knit but you can also use pure cotton.
1. Klip 1 stykke stof der måler 42x10 cm. +0,5 cm sømrum. Sløjfen kan have præcis den form du gerne vil have, jeg har lavet den rund men den kan også gøre mere spids som kanin øre. Denne er lavet med to cirkler med ca 3 cm imellem som so tegnes sammen med en hals imellem sig. Se billedet.
Cut 1 piece of fabric that measure 42x10 cm (17 inches x4 inches) +0,5 cm seam allowance . The bow can be any shape you like, i made it round, but you can make it more pointy if you like. This one is made with 2 cirkels, 3 cm (1,20 inches) apart and then I drew them together. See the picture below.

2. Fold det store stykke stof på midten og sy 0,5 cm inde langs kanten, men start og slut 3 cm fra enden.
Fold the big piece of fabric in the middle and sew along the edge with 0,5 cm seam allowance. But start and end the seam around 3 cm/ 1,20 inches from the top and bottom edge.


3. Vend stoffet så retsiden er ud ad, og sy enderne sammen ret mod ret så du har en cirkel med en lille åbning.
Turn the scrunchy right side out, and sew the top and bottom edges together so you have a cirkel with a tiny whole in it.

4. Kilp et stykke elastik i den ønskede længde, træk den igennem løbegangen og sy den sammen.
Cut a piece of elastic in the length you like, pull it through the scrunchy and sew the ends together .

5. Sy hullet i siden af scrunchy´ens side sammen i hånden, dette giver det pæneste mest usynlige resultat.
Sew the small whole with tiny stitches by hand.

6. Læg de to sløjfedele ret mod ret og sy 0,5 cm fra kanten hele vejen rundt men lad et lille hul være. Klip der efter små hakker langs den runde kant.
Sew the two bow pieces together 0,5 cm from the edge leaving a tiny whole. Cut small pics around the edge.

7. Vend sløjfen om og stryg den. Sy derefter det lille hul sammen i hånden.
Turn around the bow so the right side are out, iron it and sew the tiny whole by hand.

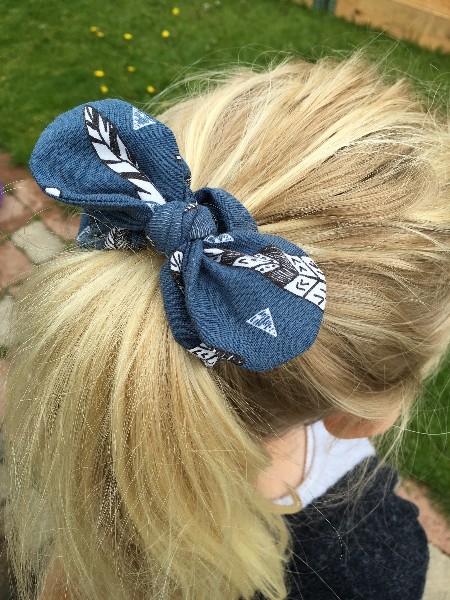
8. Sløjfen bindes om scrunchy`en og din elastik er færdig.
The bow is tied around the Scrunchy and you are done.